In order to set up your BitBox02 and create or restore your wallet, you need to download the BitBoxApp for your computer or your Android smartphone.
Launch the BitBoxApp
Once the download has finished, install and launch the app. You should then see a screen that asks you to plug in your BitBox02.
You may either watch the BitBox02 setup video tutorial below, or continue reading this article.
Insert microSD card & plug in your BitBox02
Before you plug in your BitBox02, please insert the microSD card, which will be needed to create a backup of your wallet in a later step.
When done, plug the BitBox02 into your computer. Optional: If needed, use the included USB-C to USB-A adapter or any USB-C extension cable you may have at hand.
Follow the in-app setup guide
Once the BitBox02 is plugged in, the setup guide will automatically start and guide you through the process of setting up your BitBox02.
Step 1: Install BitBox02 firmware
Once you plug in your BitBox02 you will see that it says "BitBox02 bootloader" as all new devices come without the firmware preinstalled to ensure you always start off with the latest firmware.
The BitBoxApp will then recognize your BitBox02 and ask you to upgrade the firmware.
You will see a progress bar during the firmware installation process. Wait until the installation process has finished. The BitBox02 will restart automatically once the process is completed.
Step 2: Choose display orientation
Most laptops have ports on both sides. As we cannot know from which side you will plug your BitBox02, you will first need to select your display orientation.
To do that, just touch the BitBox02 on the side that suits your current position better.
.png)
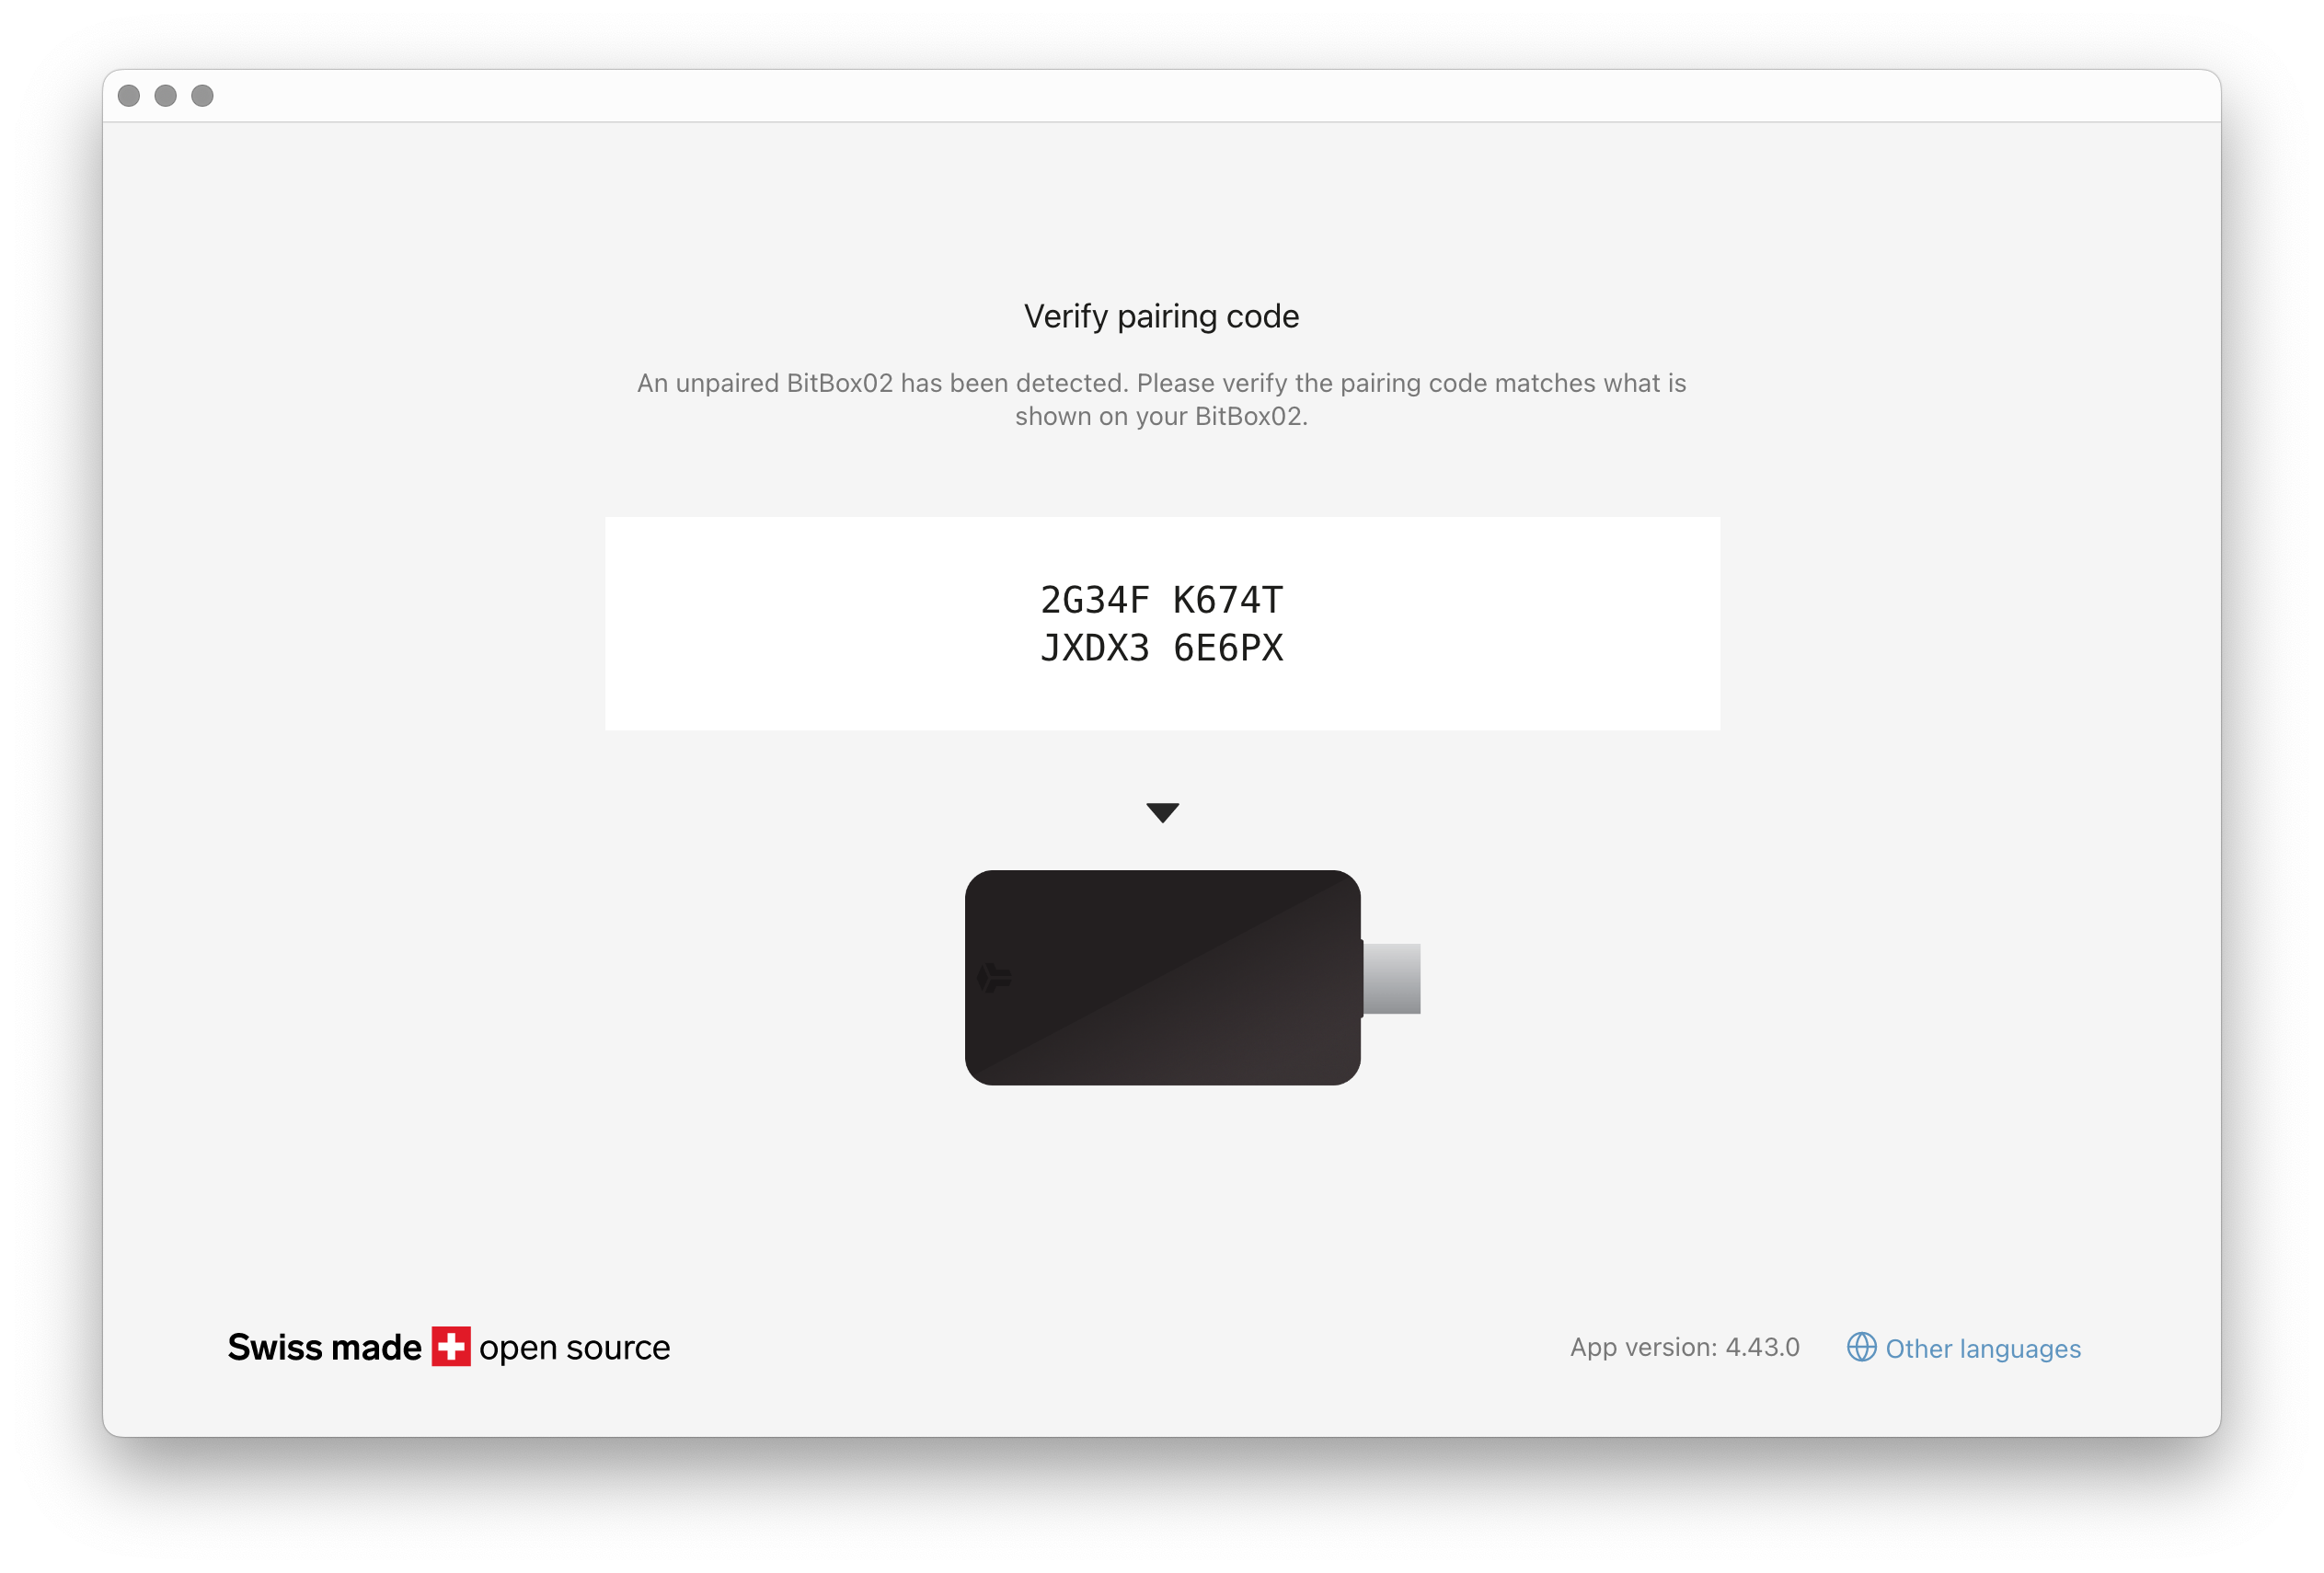
Step 3: Confirm pairing code
All information that is exchanged between your computer and the BitBox02 is encrypted. To make sure no one is listening in, we ask you to confirm that the code in the BitBoxApp and the code on your BitBox02 are identical.
Verify the code matches and confirm on your BitBox02. Then click “Continue” on the BitBoxApp. The BitBoxApp is now paired with your BitBox02. Note that this prompt will appear again if you use your BitBox02 with a new device for the first time.
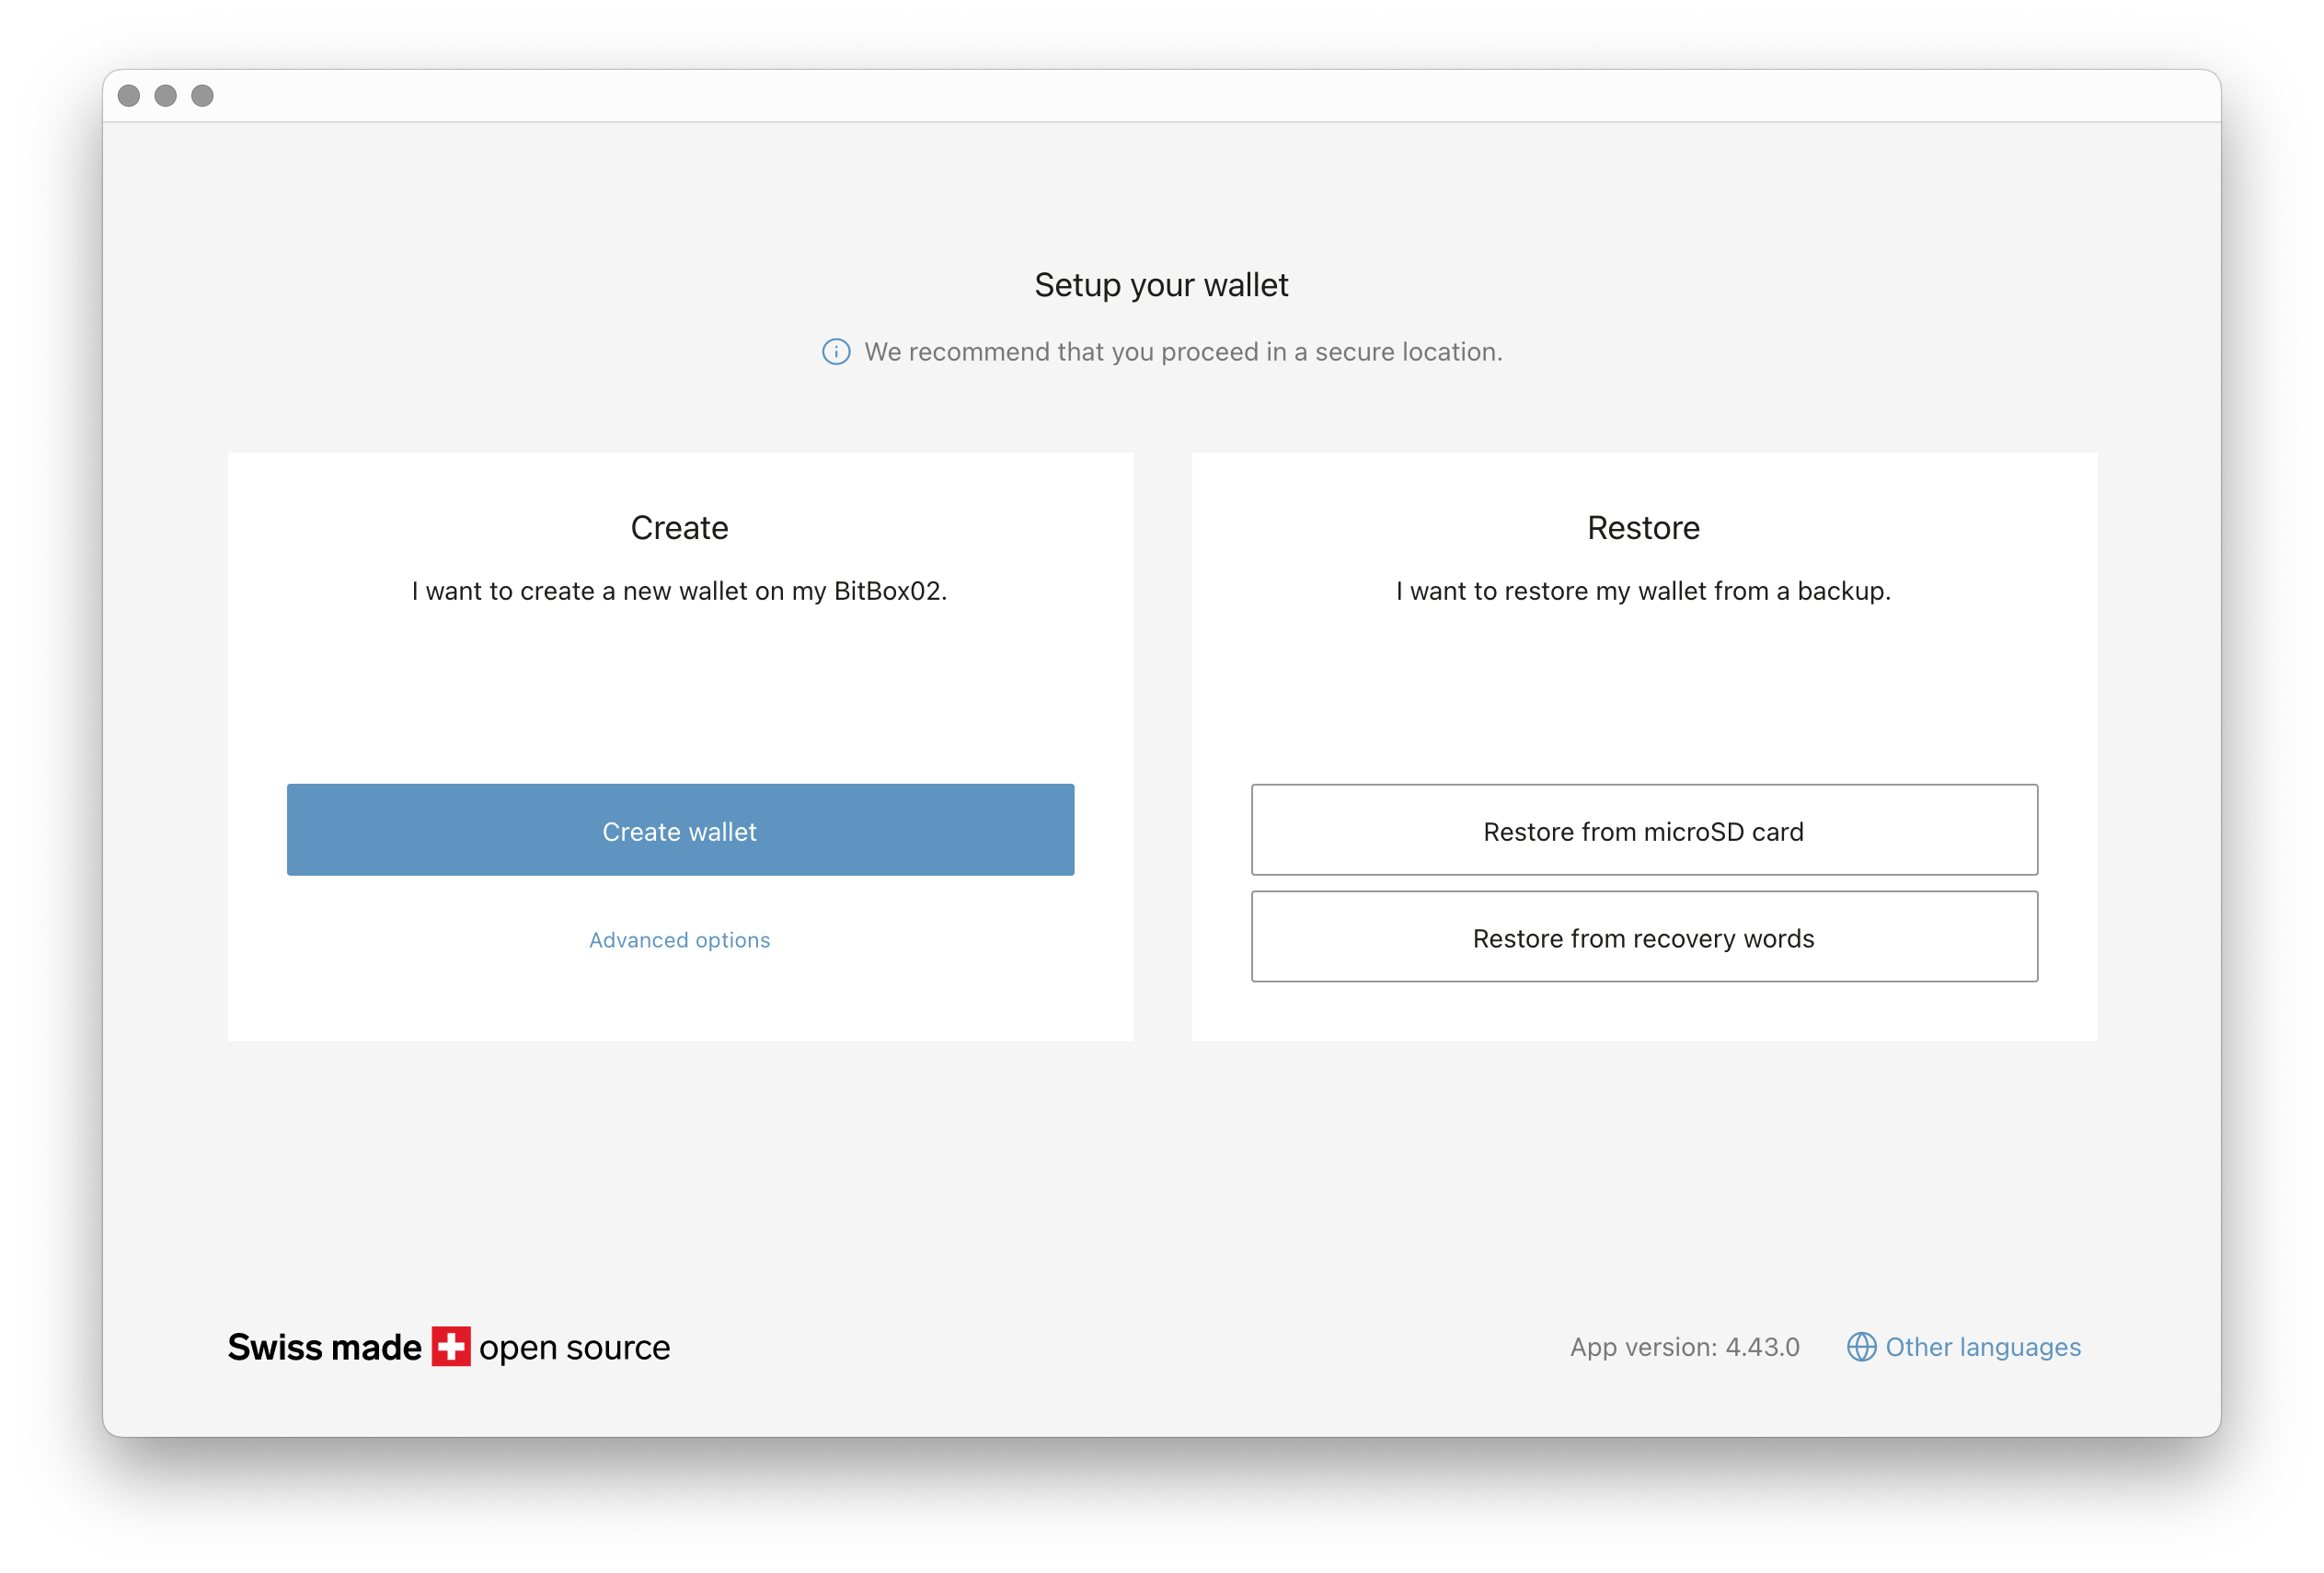
Step 4: Create new wallet or restore an existing wallet
Now you are asked to choose if you want to create a new wallet or restore an existing wallet.
- If this is the first time you create a wallet, choose "Create Wallet" and continue reading this guide.
- If you already used a BitBox02 before, and you want to restore your wallet, see How to restore my BitBox02 wallet from my microSD card?
- If you want to restore recovery words from a third-party wallet, see How to restore a wallet from 24 recovery words?
Step 5: Create a wallet
First, you need to give your wallet a name. This name can be anything, choose one you will recognize in the future when you might need to restore from your backup.
If you cannot click the “Continue” button, make sure that you have inserted your microSD card into the BitBox02 correctly, and have given the wallet a name.
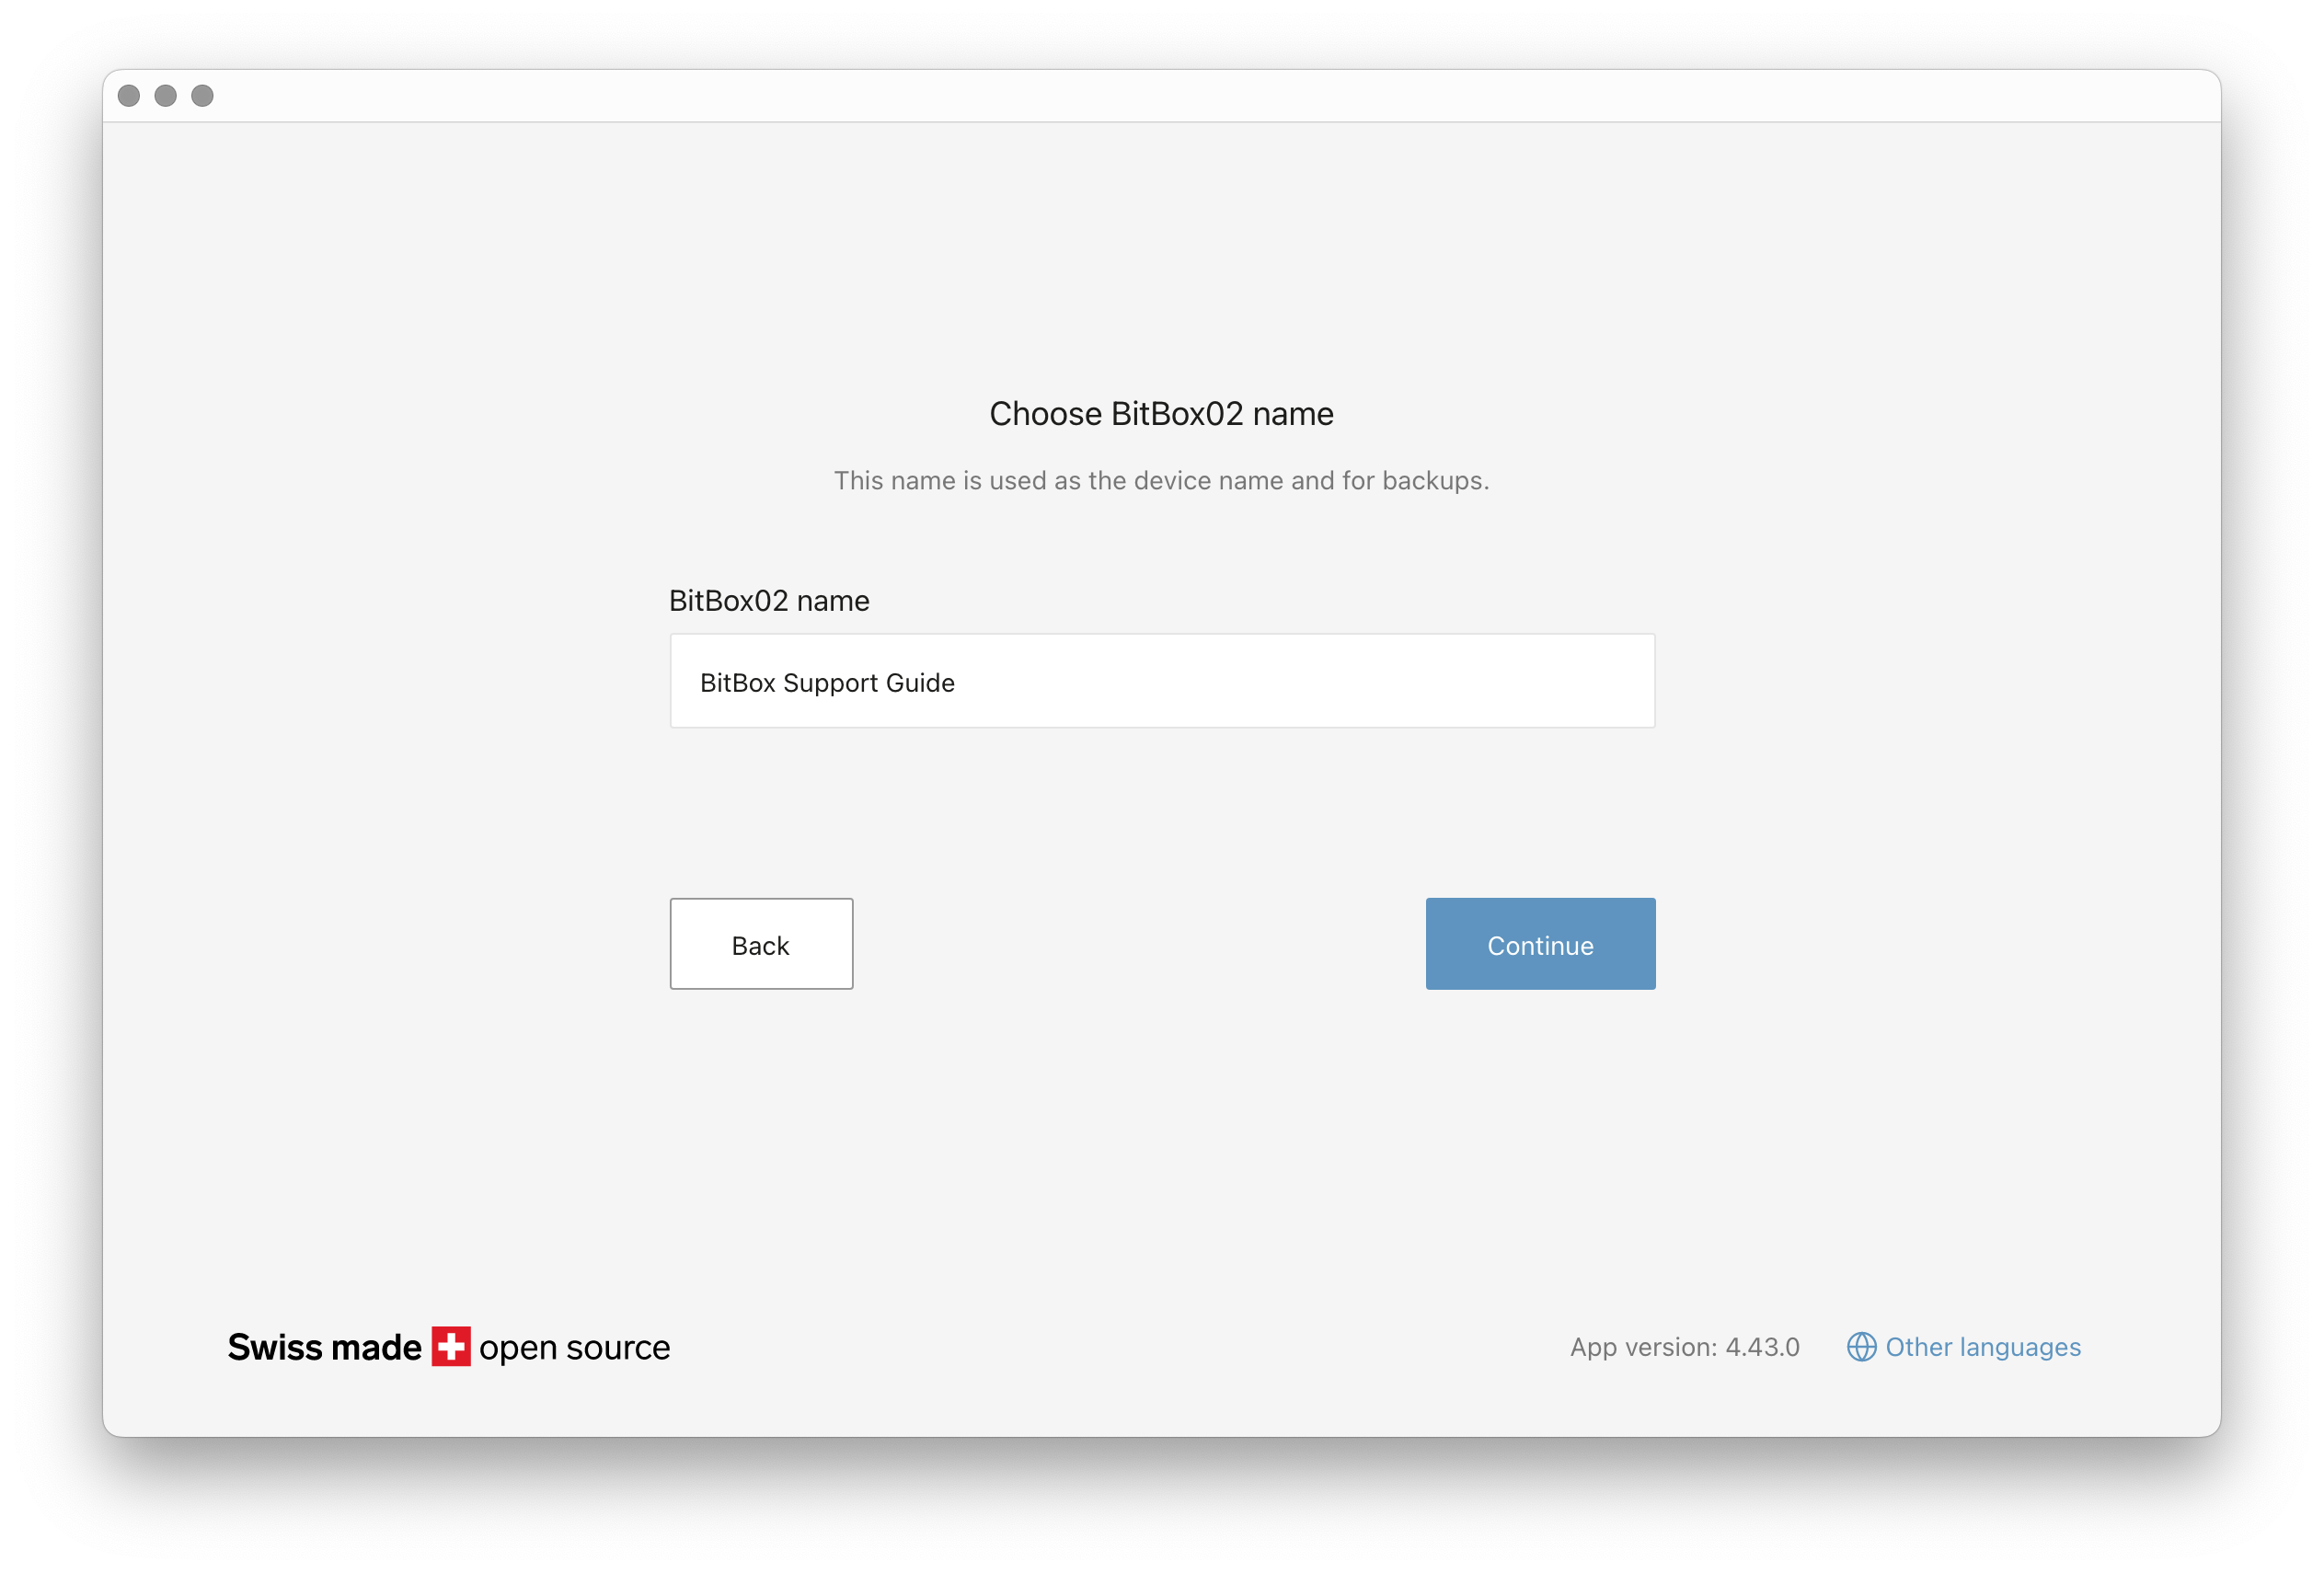
Confirm the wallet name on your BitBox02.
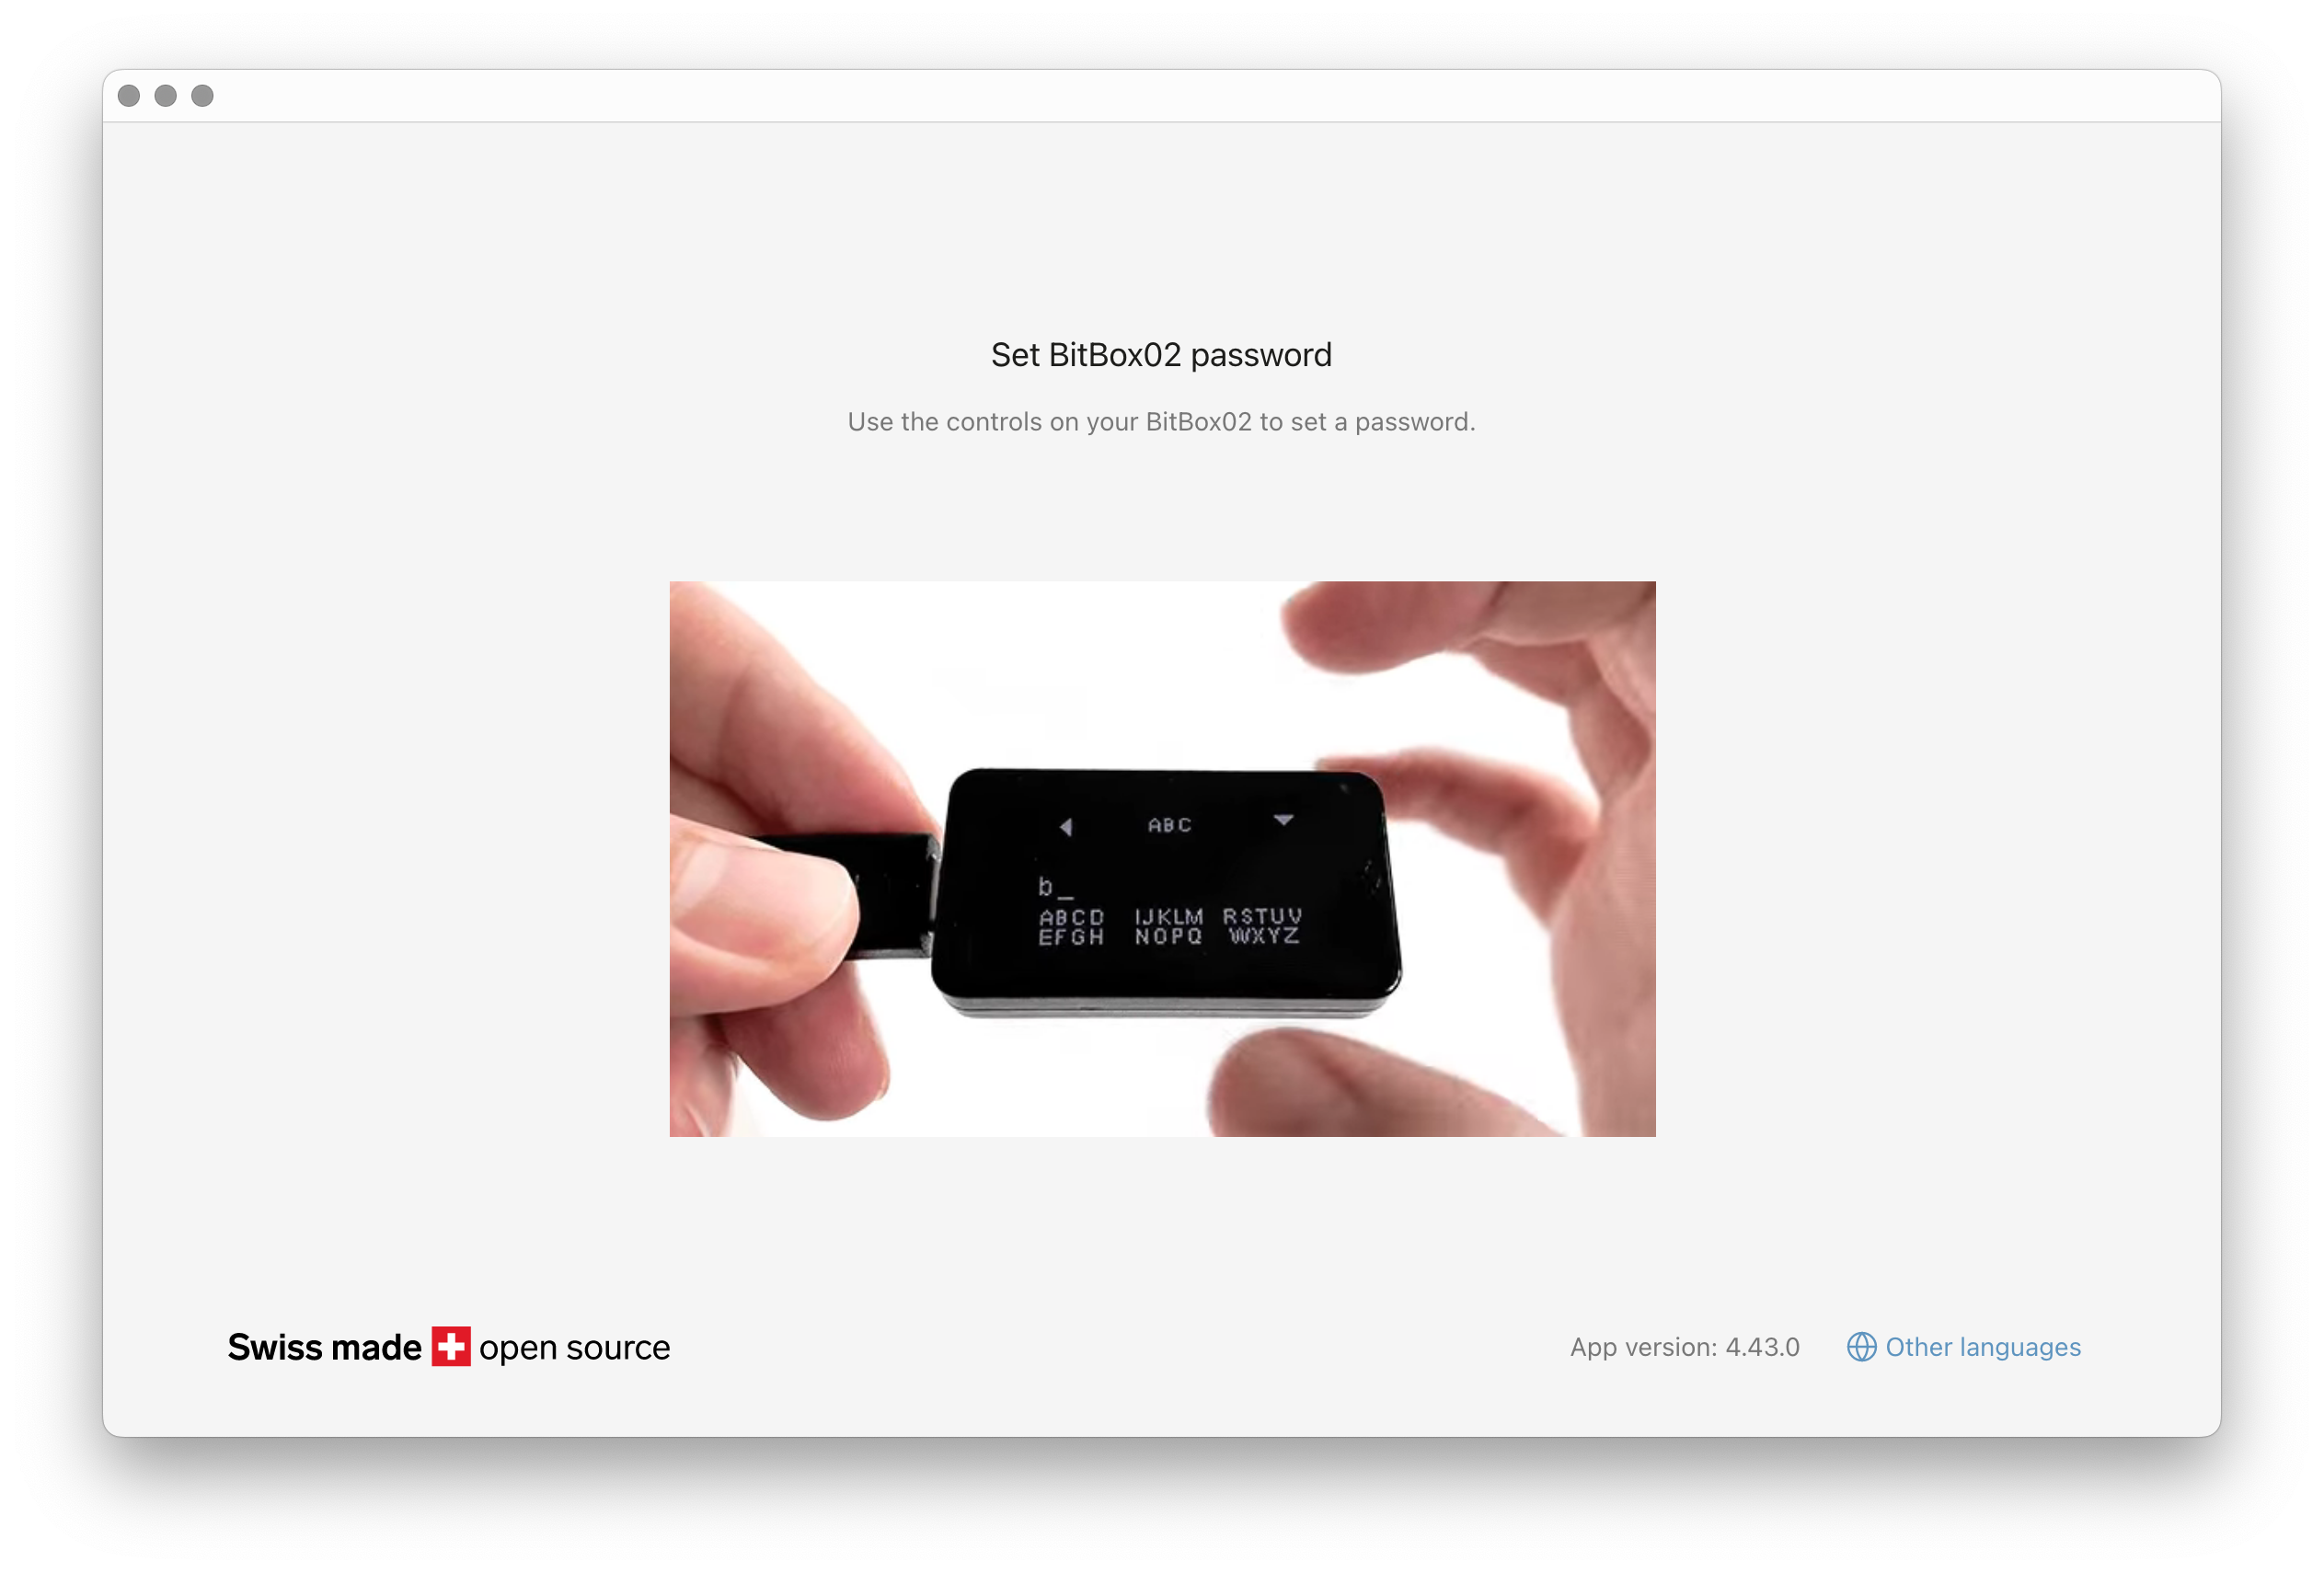
Step 6: Set your BitBox02 device password
Next, you need to set a device password for your BitBox02, which you will need to enter every time you want to unlock your BitBox02. Make sure that you remember this password. Changing the device password is only possible by resetting the BitBox02. Don't worry, in case you forget your device password, the device will eventually reset, and you can restore your wallet from a backup again.
The setup wizard will show you a video of how to use the touch on your BitBox02 to input your password.
Step 7: Create your wallet backup
After the device password is set, the BitBox02 will create a backup of your wallet and save it on the microSD card. Please check the boxes to confirm that you understand the security considerations, then click “Continue”.
Your BitBox02 will ask you to confirm today’s date, as that is needed for the backup file.
The backup file on your microSD card is not password protected. Therefore, if someone has physical access to your microSD card, they have full control over the funds. That is why you should make sure that you store your microSD card backup in a safe location.
- You can create multiple backups of your wallet on multiple microSD cards. See How to create additional microSD card wallet backups?
- You can check at any point that you still have a valid backup. See How to verify my wallet backup?.
Step 8: Start using your BitBox02
Great! Your BitBox02 is ready to use. Please make sure that you store your microSD backup in a secure location.
The microSD card is not required to work with your BitBox02 for day to day usage. It is only needed when you are configuring your BitBox02 for the first time, or when you want to restore your wallet from the microSD backup.
Step 9: Improve your backup security
While the microSD is great for convenient and secure backup creation and recovery, it is not built to withstand fire, water or physical damage. It can make sense to create an additional backup of your 12 or 24 recovery words and, for example, store it with a Steelwallet, built to withstand almost anything, to make sure you stay in control over your coins.