Setting up your BitBox02 hardware wallet is a quick and straightforward process. Follow these simple steps to secure your cryptocurrencies.
1. What you'll need:
- Your BitBox02 device
- The included microSD card
- A computer (Windows, macOS, Linux) or Android smartphone
- An internet connection (for downloading the BitBoxApp)
2. Download and install the BitBoxApp
- Go to the official BitBox website:
bitbox.swiss/download - Download the BitBoxApp for your operating system (Windows, macOS, Linux, or Android).
- Install and open the BitBoxApp.
3. Connect your BitBox02
- Insert the microSD card into your BitBox02.
- Plug your BitBox02 into your computer or Android phone (if necessary, using the USB-C connector or the provided adapter).
- The BitBox02 will power on.
4. Follow the on-screen instructions in the BitBoxApp
The BitBoxApp will guide you through the entire setup process. Here's a quick overview of what to expect:
4.1 Install Firmware
If it's a new device, the app will prompt you to install the latest firmware. This ensures your BitBox02 has the most up-to-date security features. Click "Install firmware" and wait for the process to complete. Your device will restart.
4.2 Choose Display Orientation
Touch the side of the BitBox02 that is most convenient for you to view the screen..png)
4.3 Confirm Pairing Code
A unique code will appear on both the BitBoxApp and your BitBox02 screen. Verify that these codes match. This encrypts the communication between your device and the app. Confirm on your BitBox02 and click "Continue" in the app.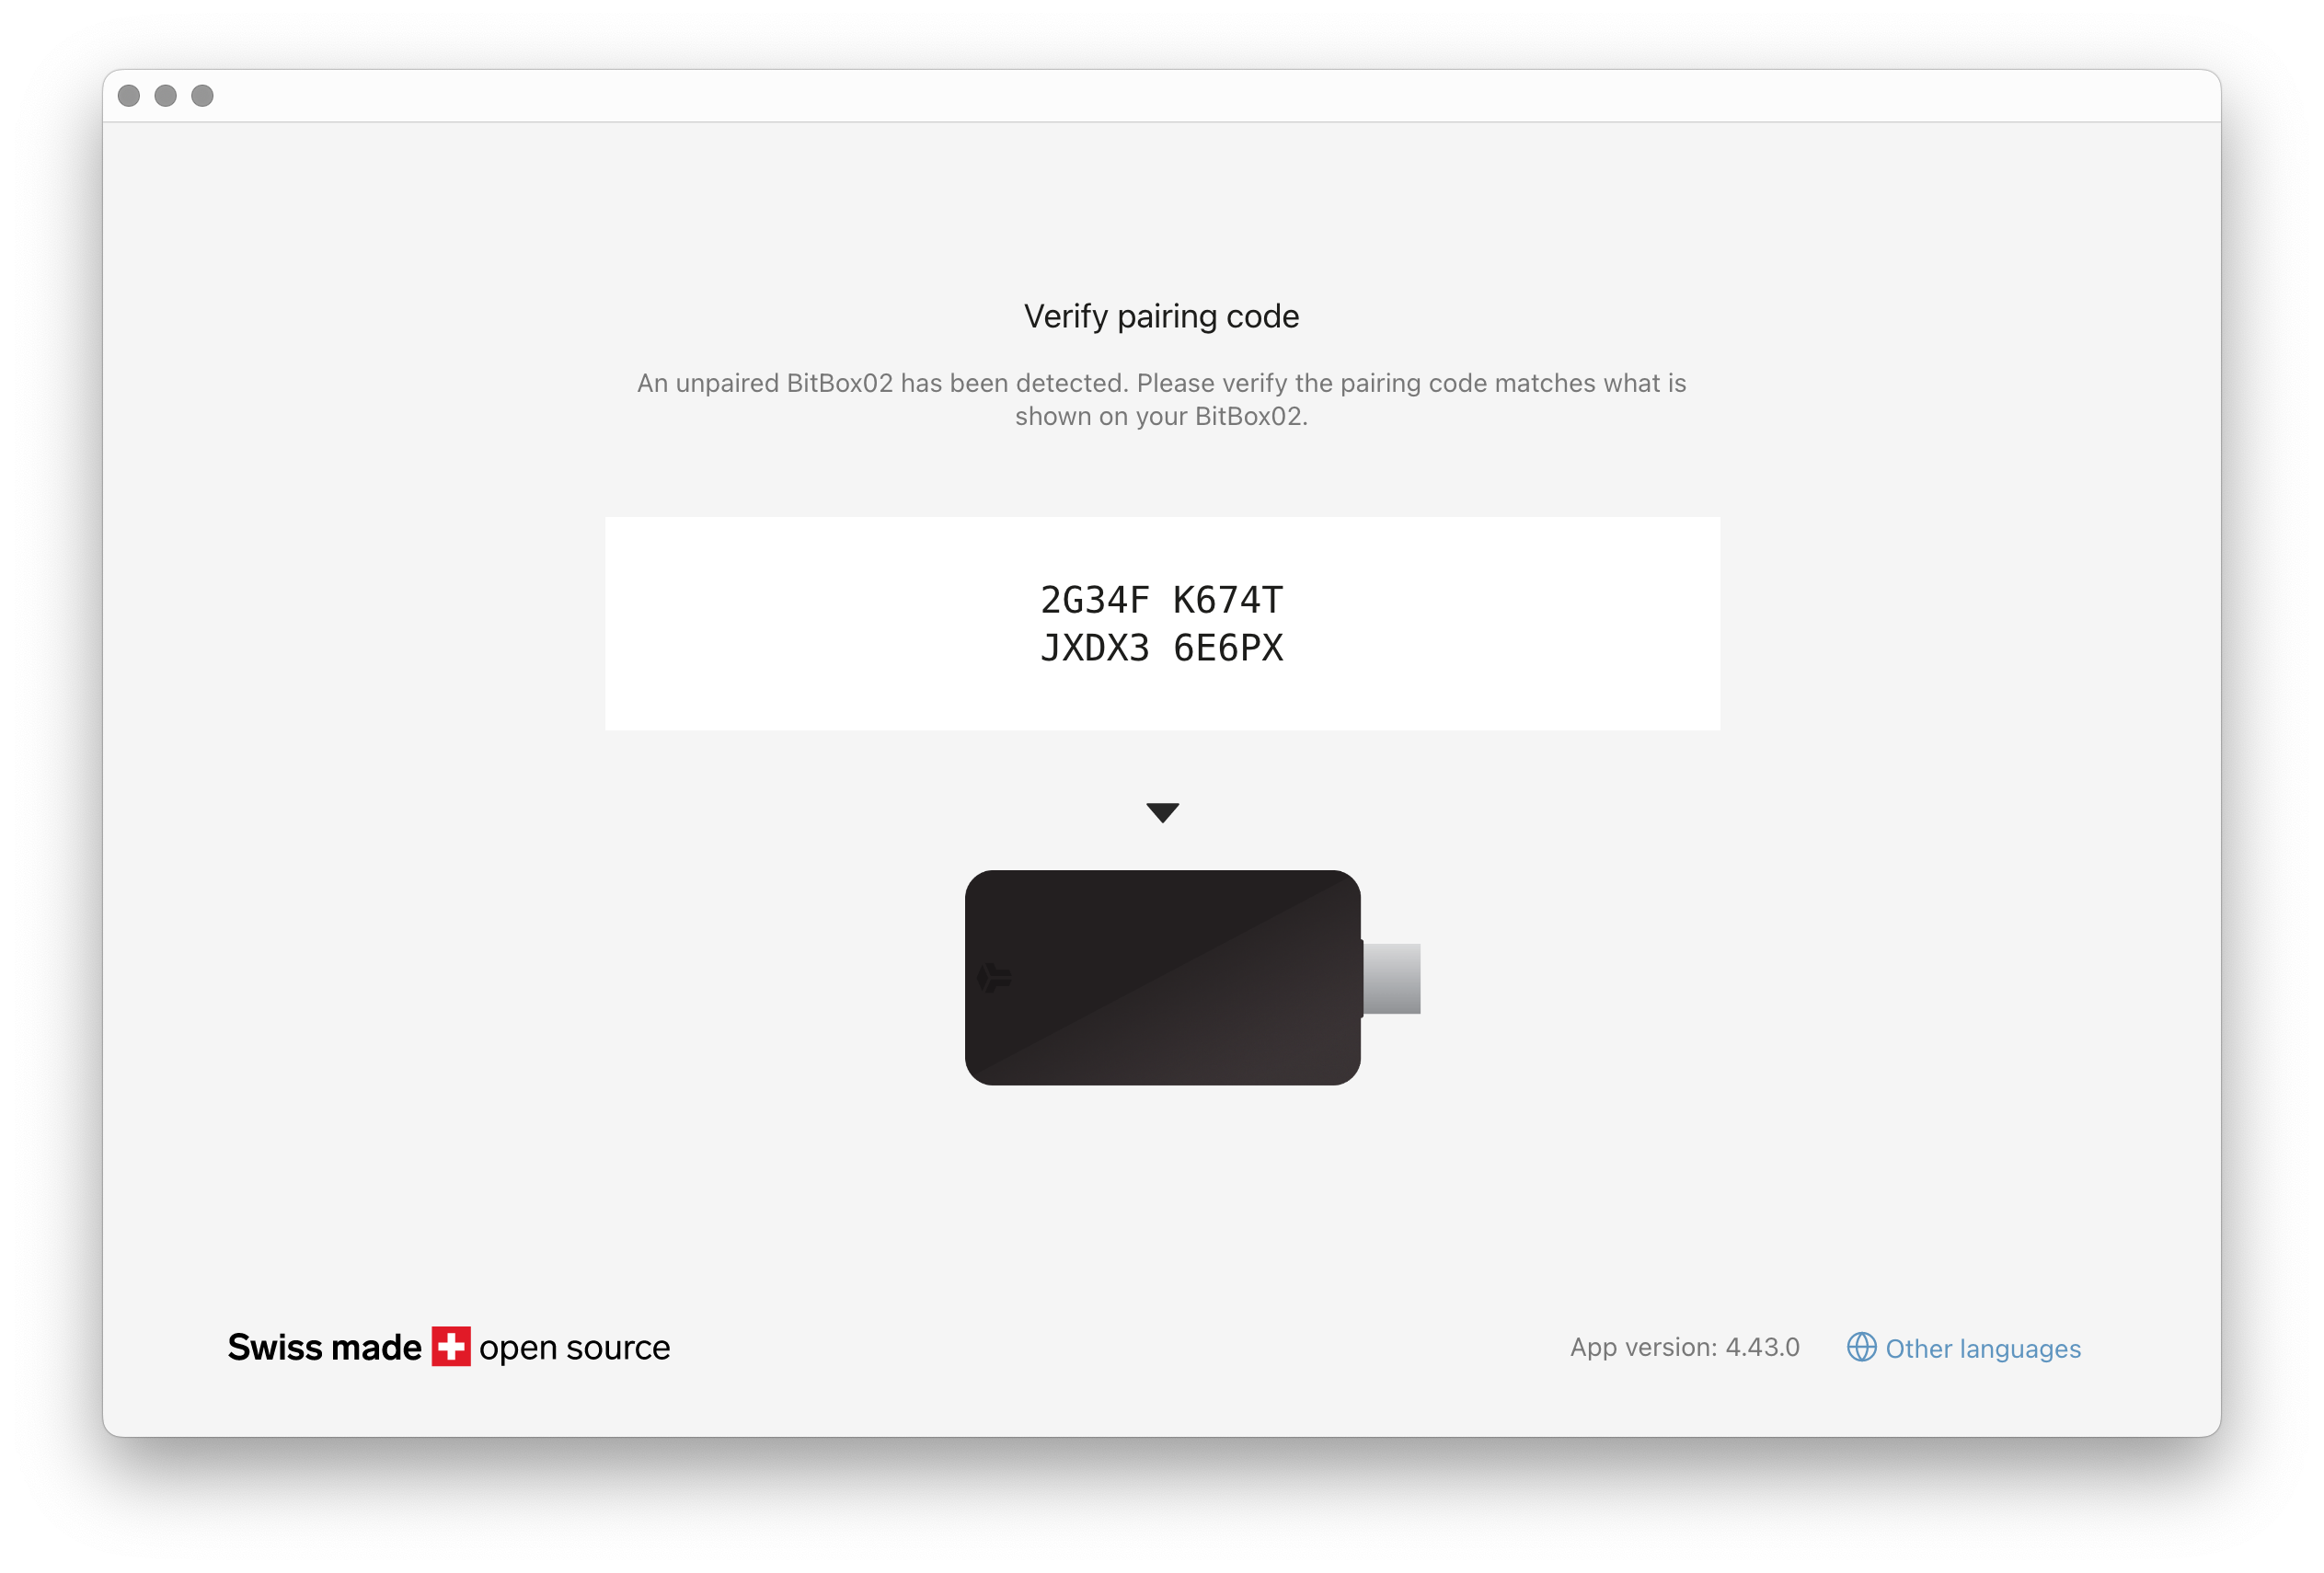
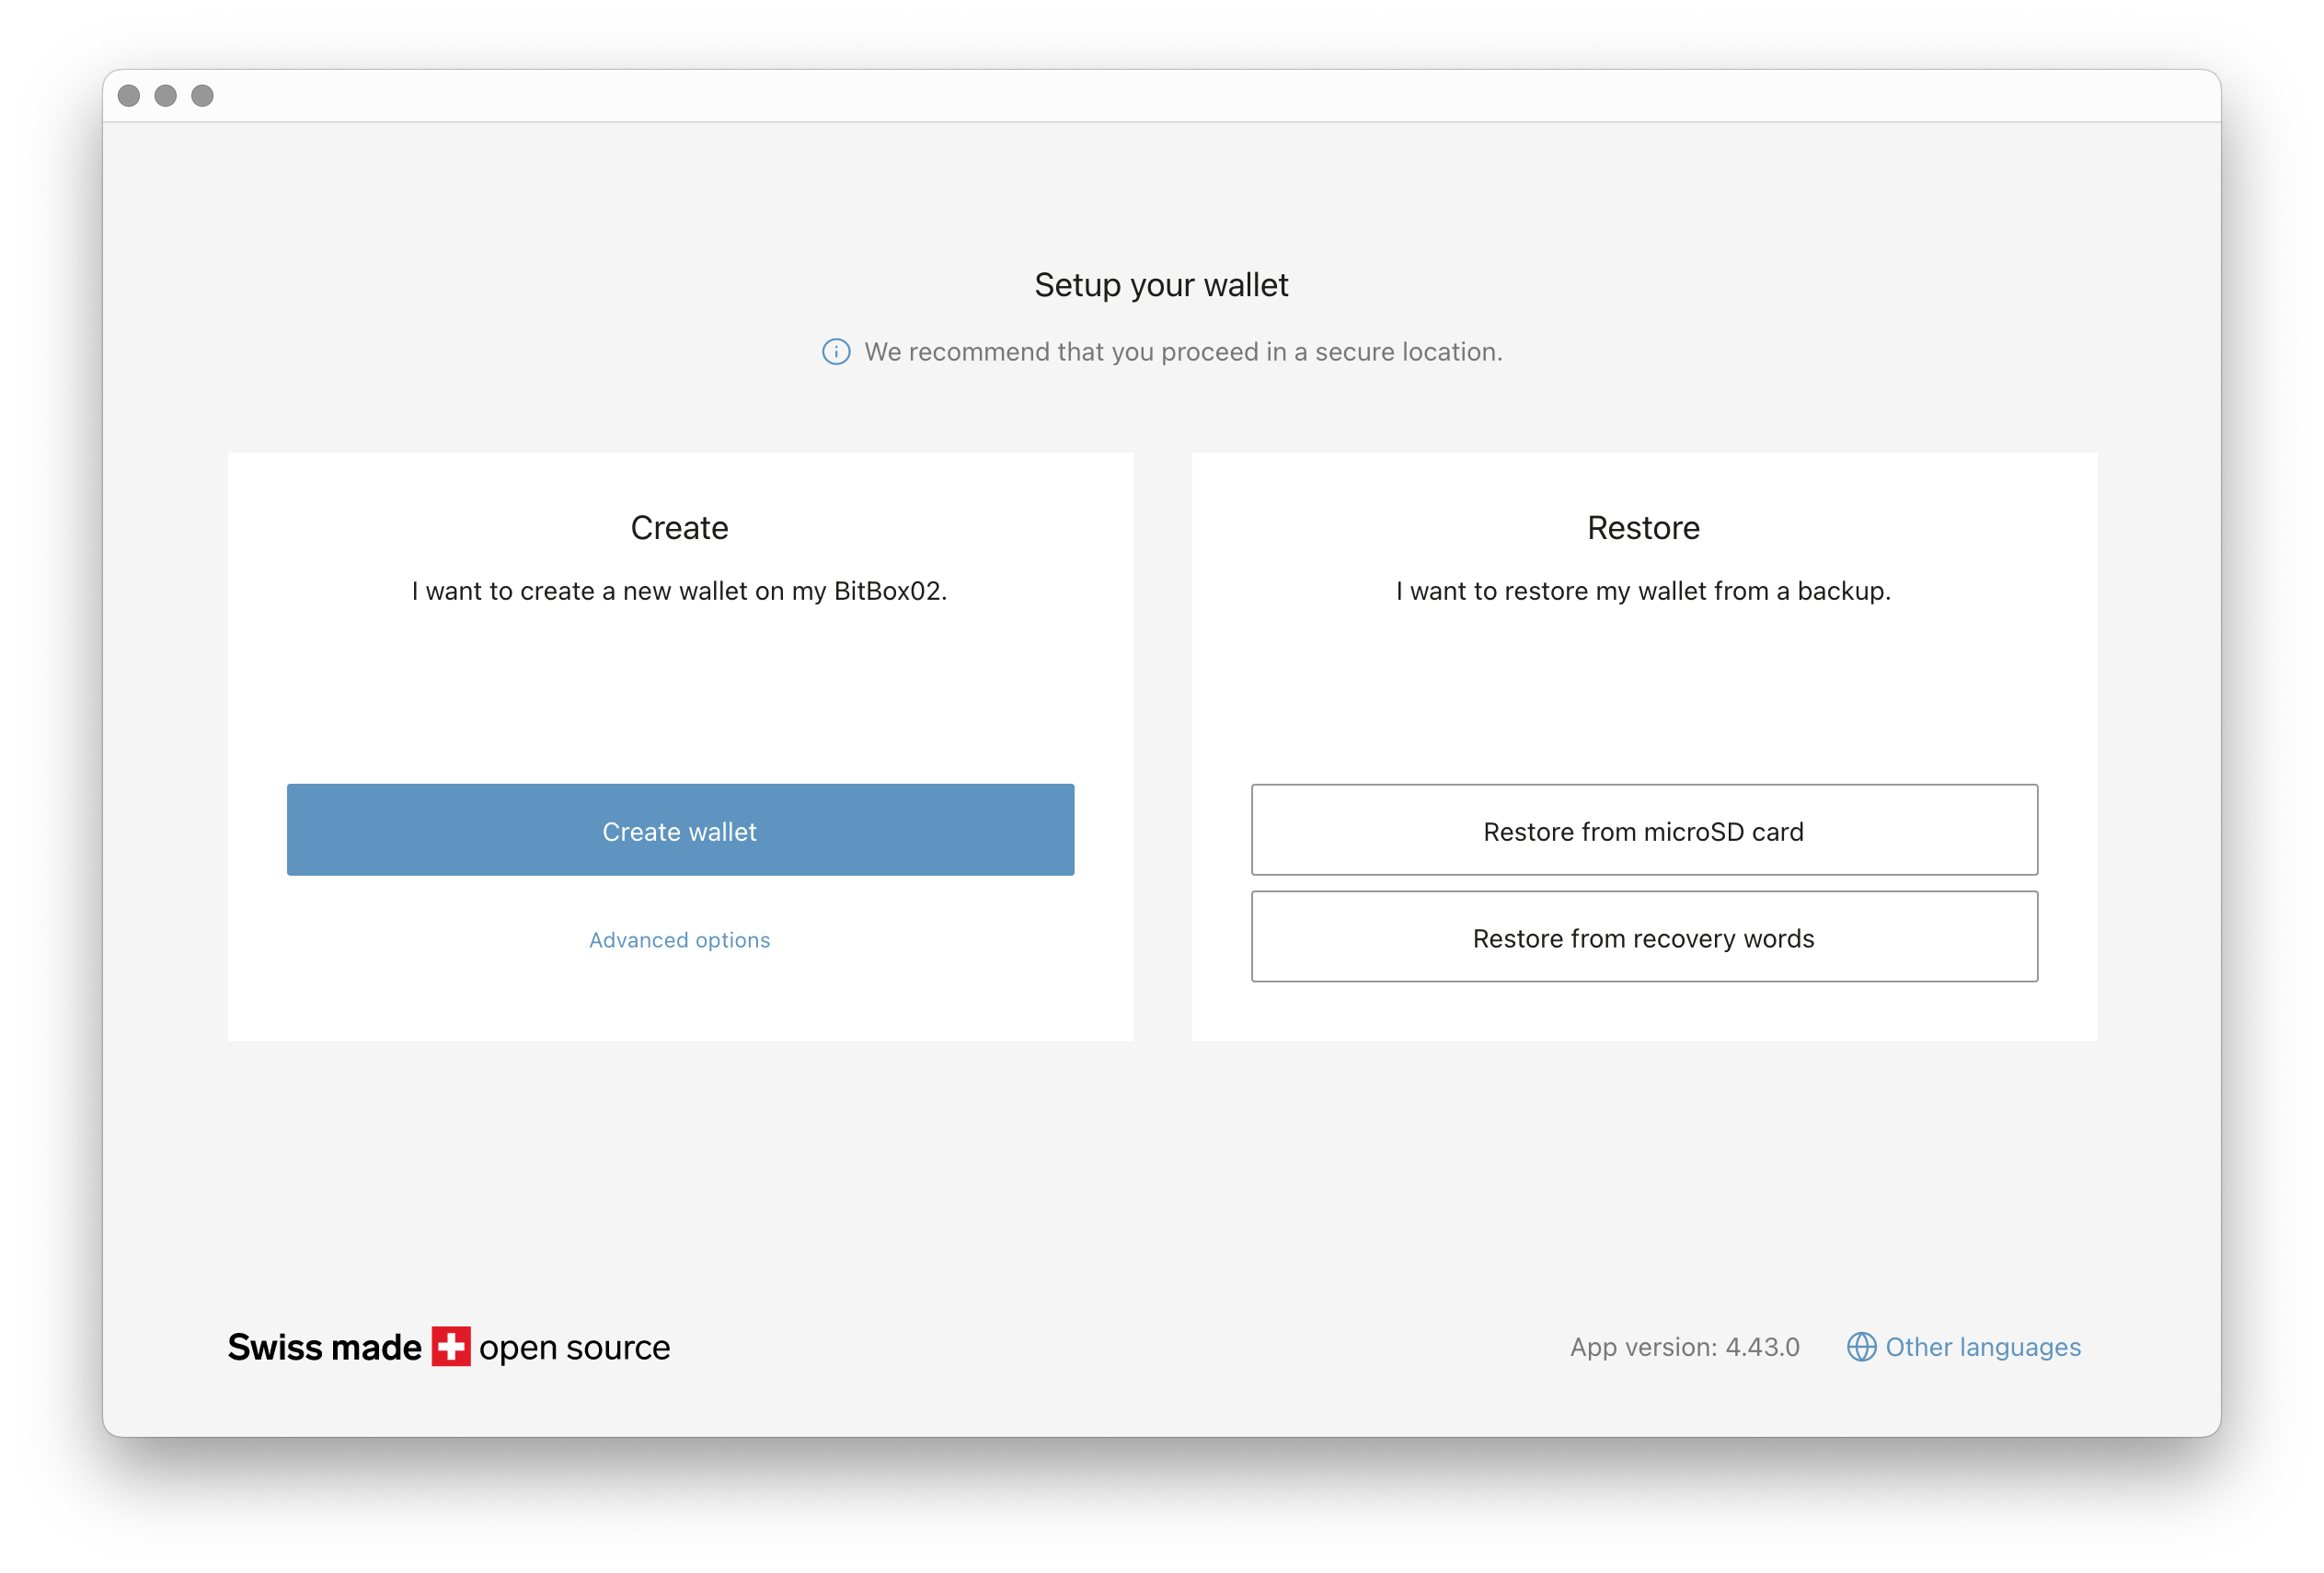
4.4 Create or Restore Wallet
- If this is your first time, select “Create wallet.”
- If you are restoring from a previous backup, choose "Restore from …" and follow the instructions.
4.5 Name Your Wallet
Give your wallet a recognizable name. This name will also be used for your backup file. Confirm the name on your BitBox02.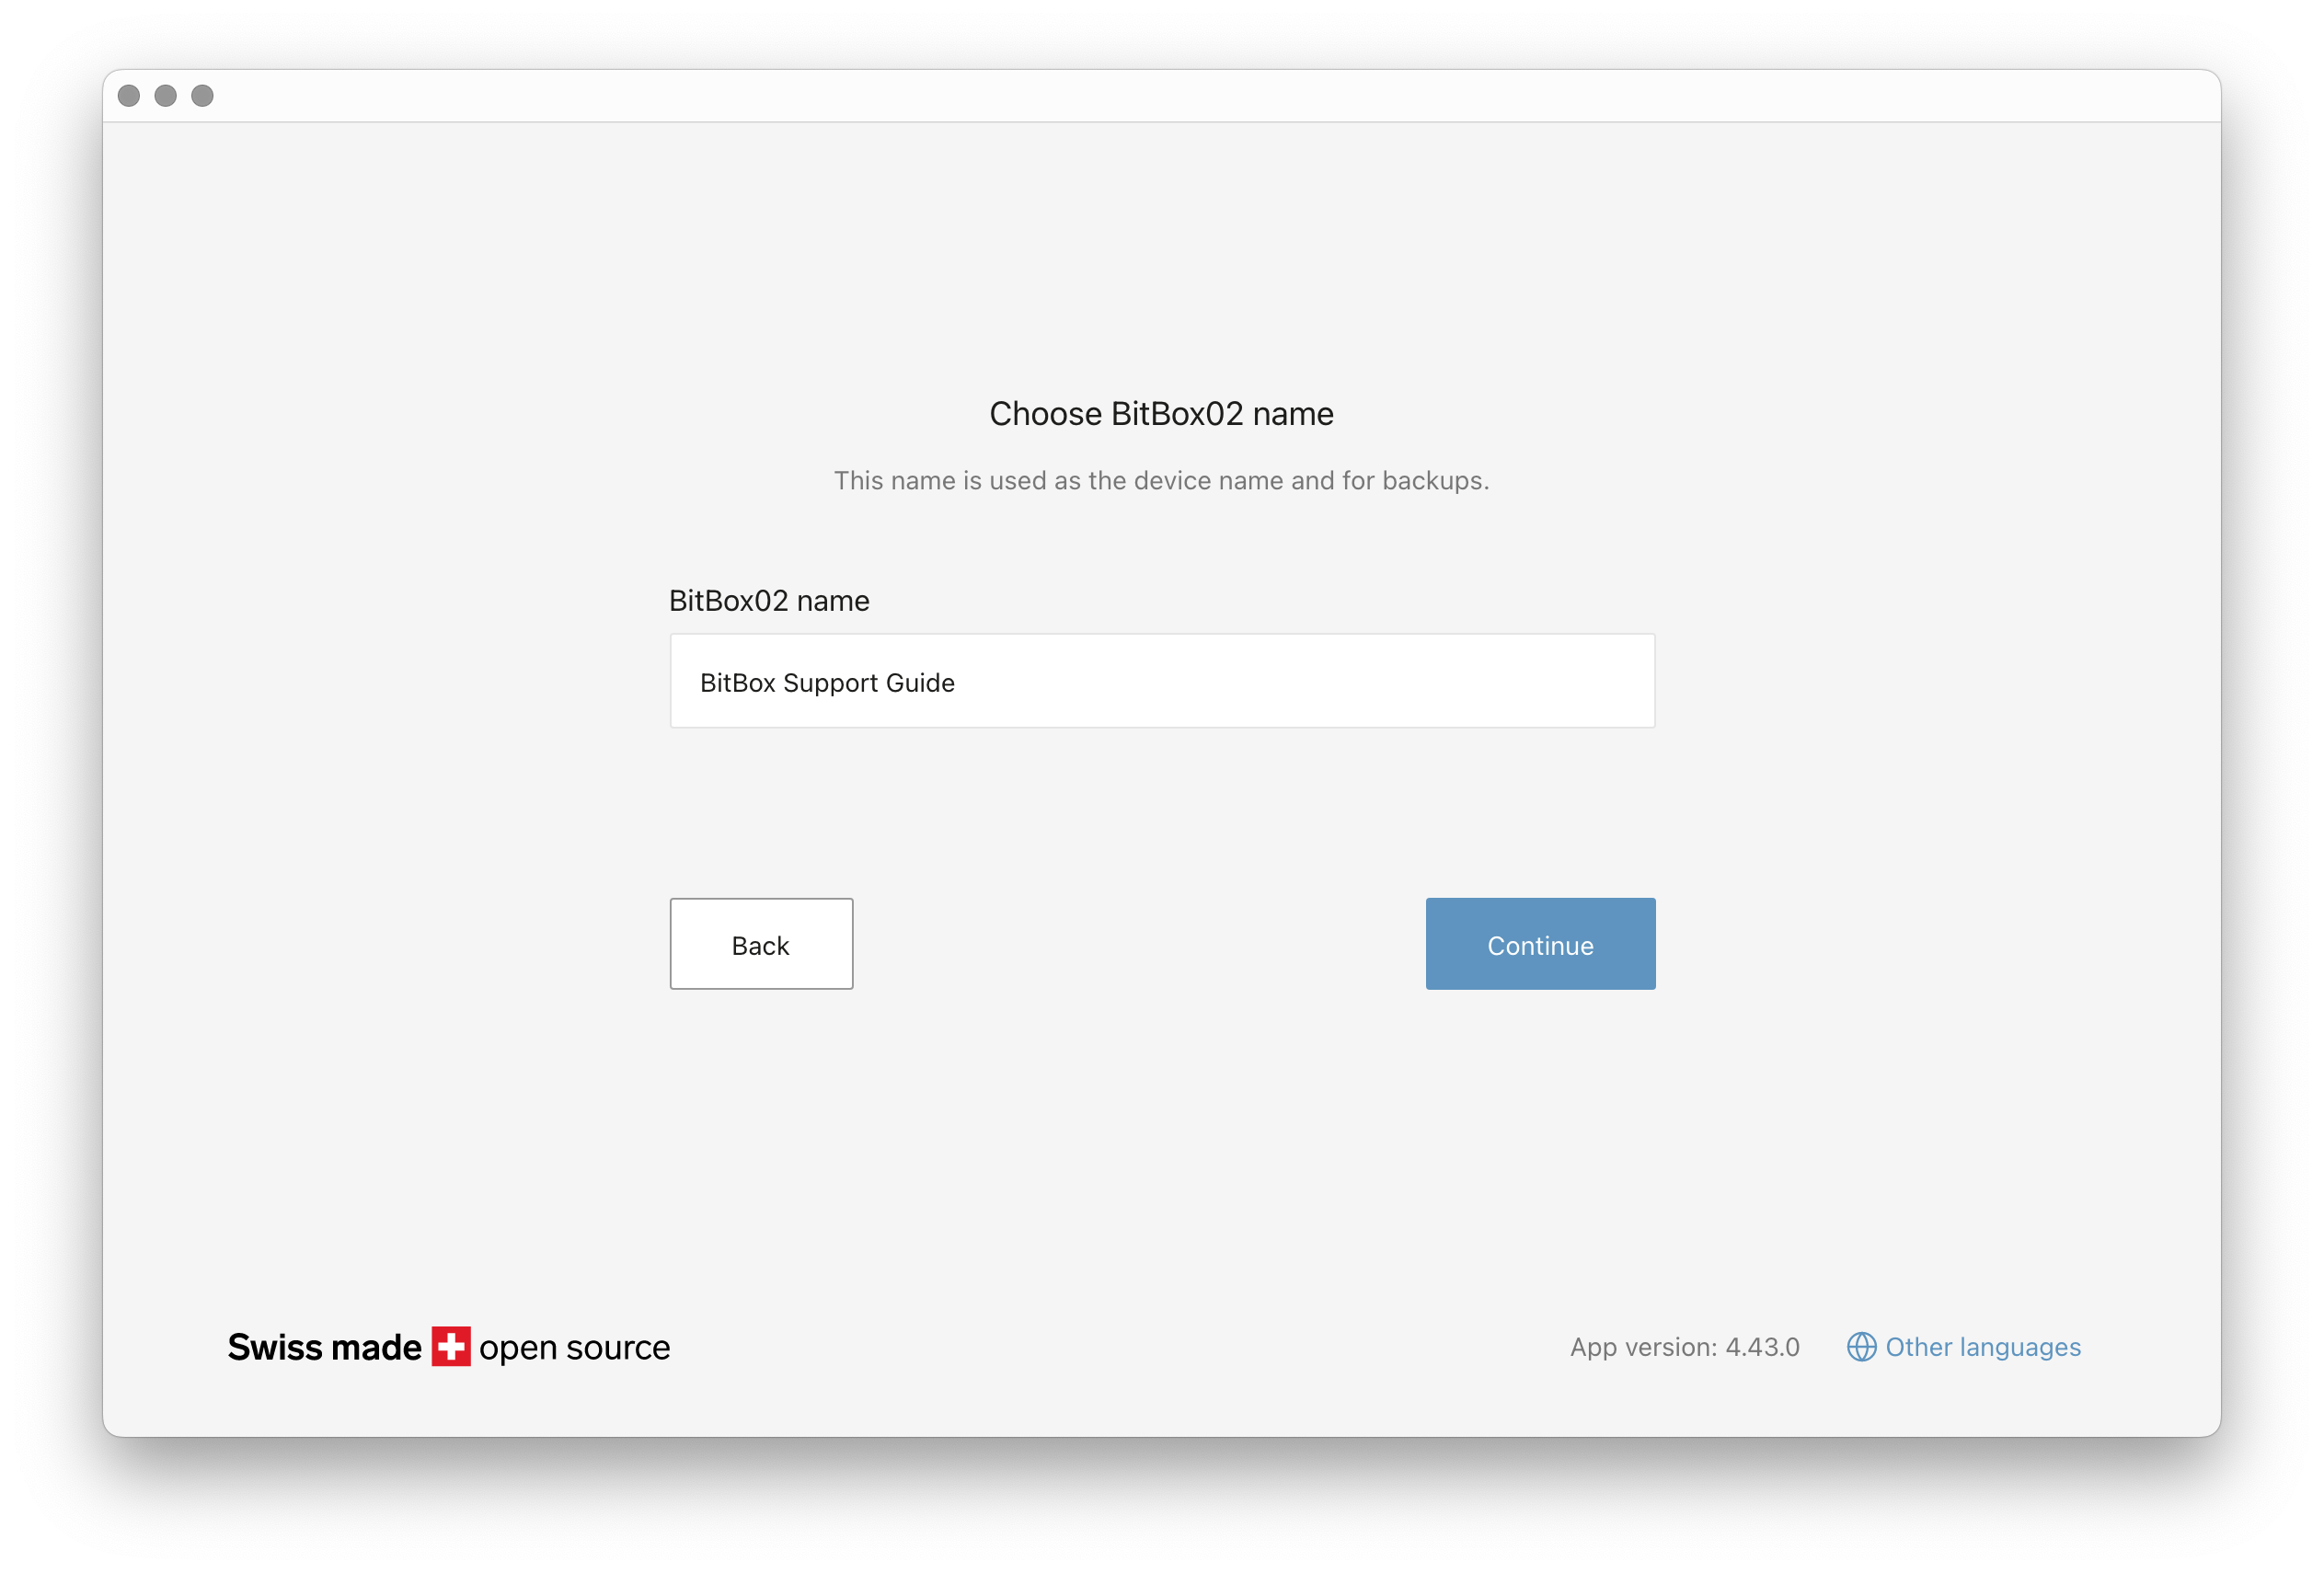
4.6 Set Your Device Password
Choose your password carefully during initial setup. Once set, the device password cannot be changed unless you reset the BitBox02 to its factory settings. This process erases all data on the device, requiring you to restore your wallet from your backup.
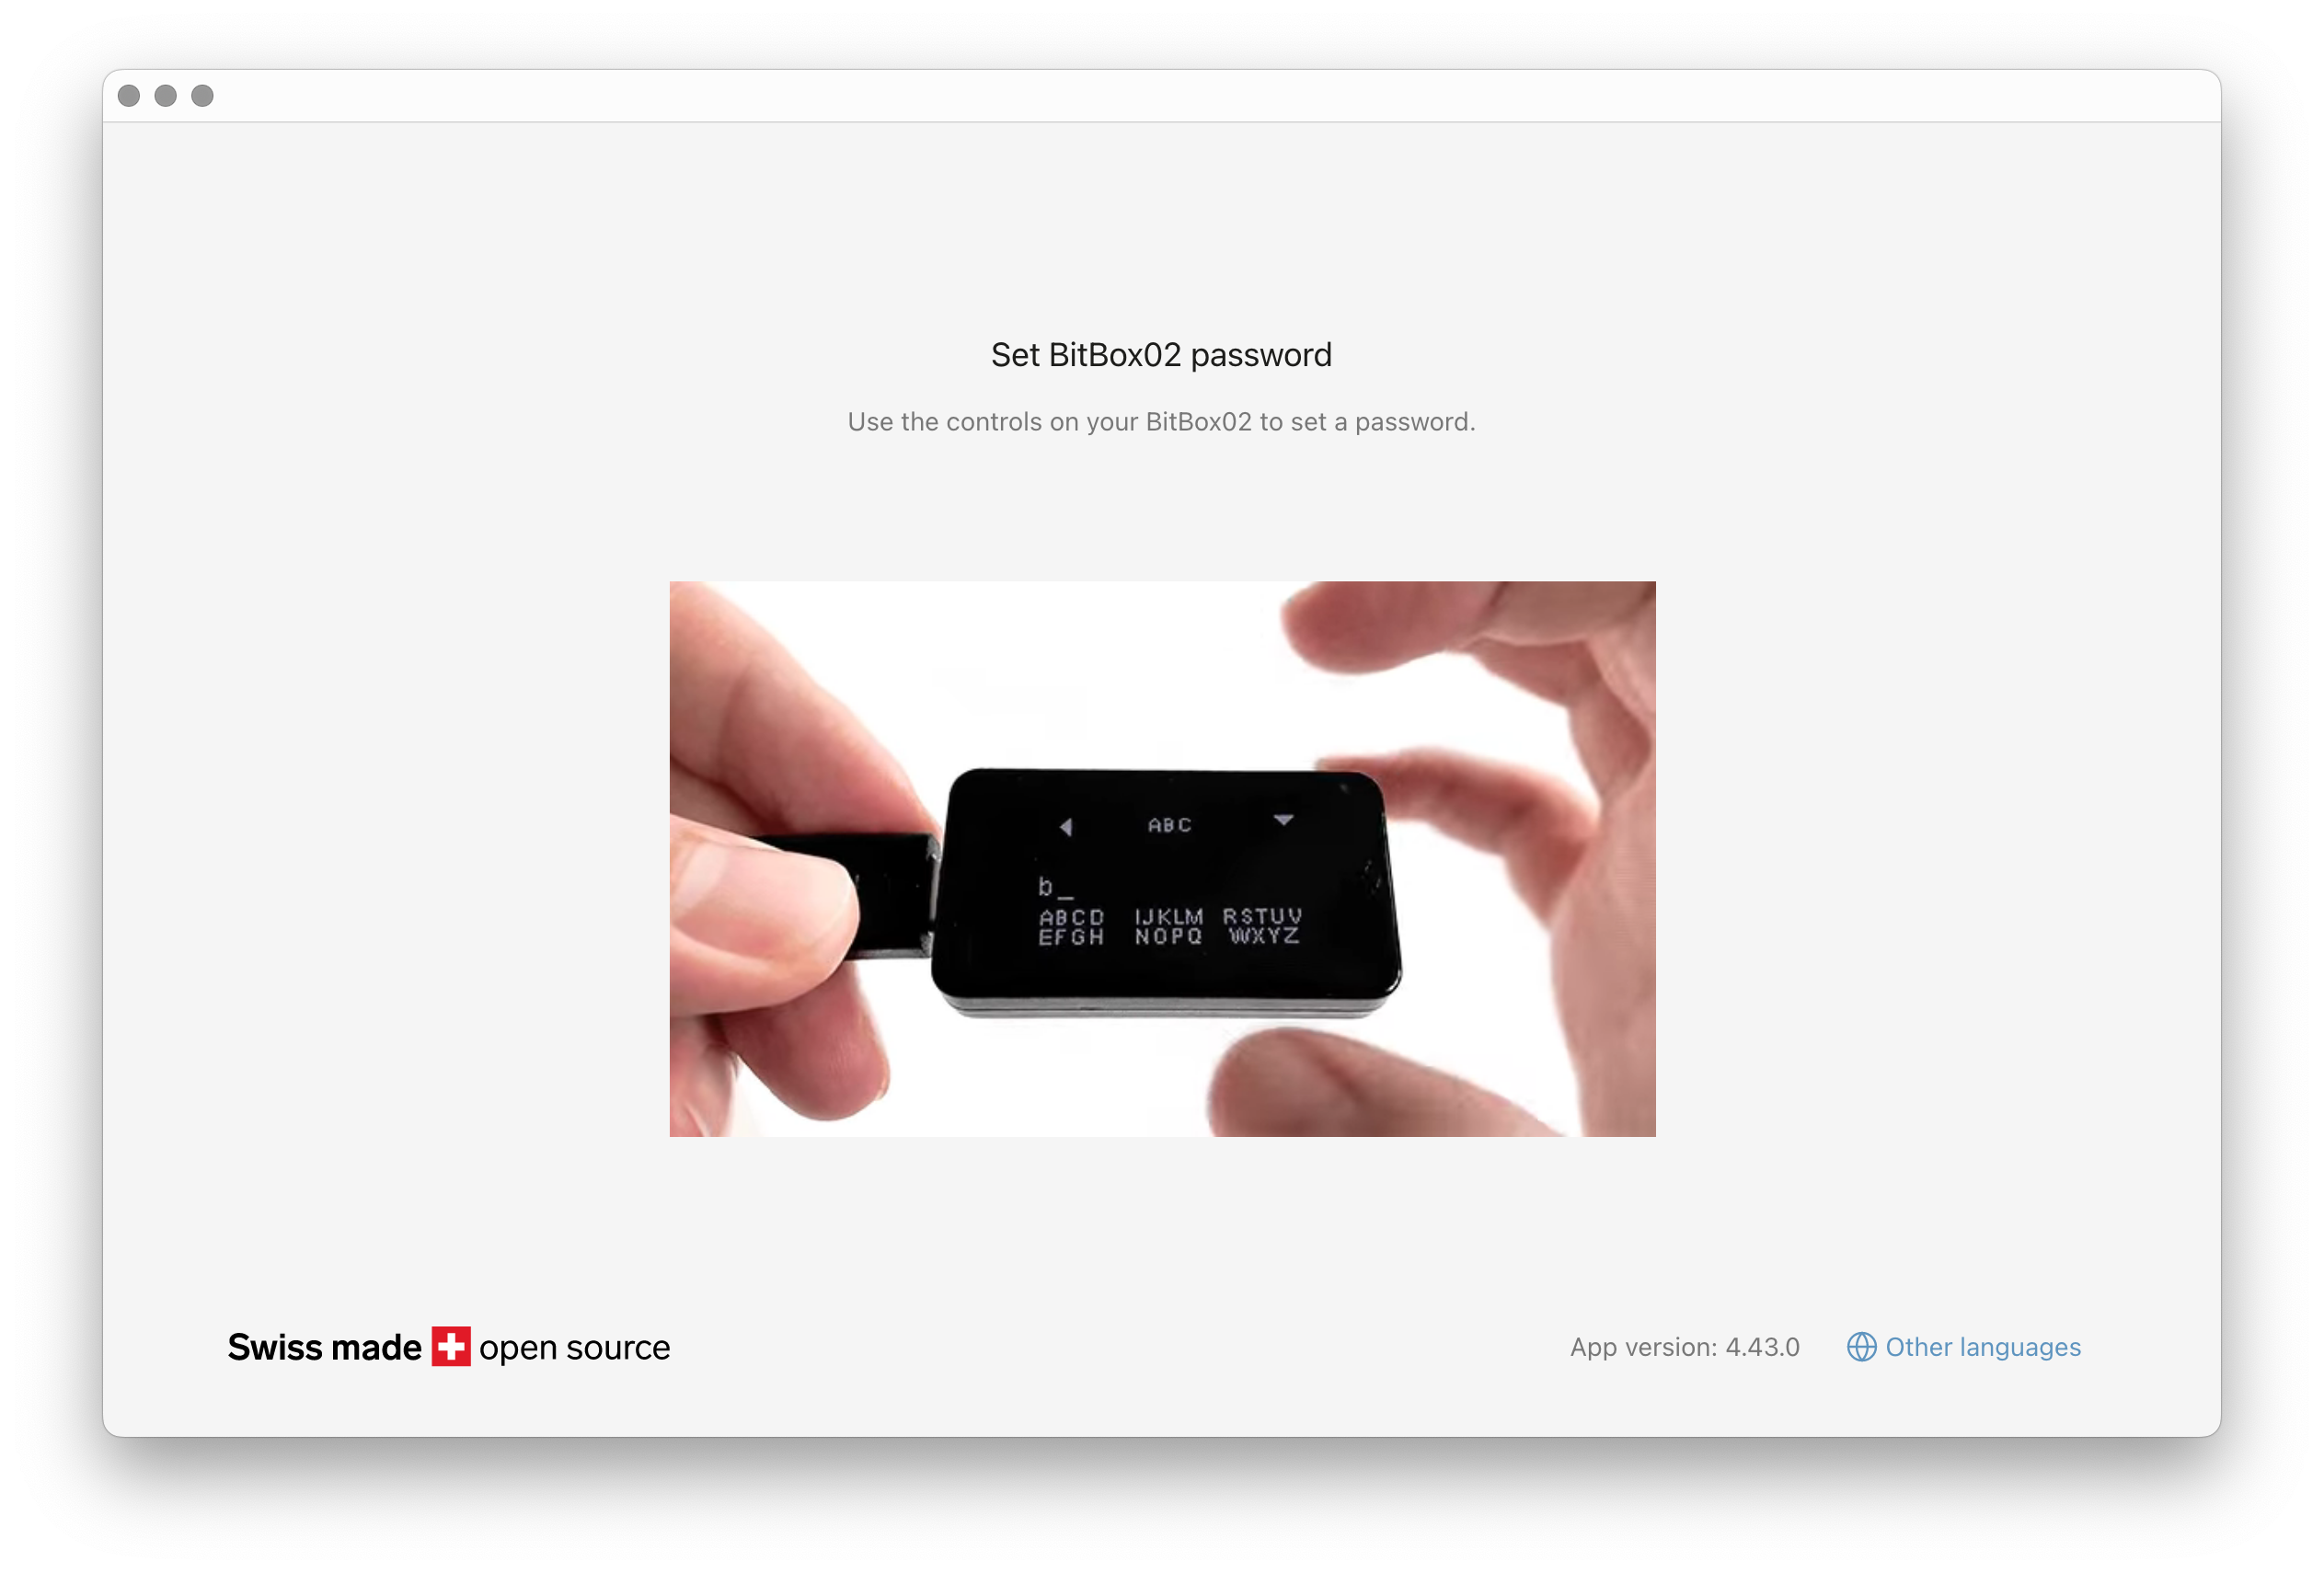
Make sure to commit your password to memory. The BitBoxApp will guide you on how to enter it using the device's touch sensors.
4.7 Create your wallet backup
The BitBoxApp will guide you through creating an encrypted backup of your wallet onto the microSD card. Read the security considerations carefully. You'll be asked to confirm today's date on the BitBox02.
4.8 Secure your microSD card
After backup, remove the microSD card from your BitBox02 and store it in a highly secure and secret location.
Crucial: The backup on this card is not password-protected by default. Anyone with physical access to the card can view the backup. This design prioritizes easier recovery; read more about the reasoning behind this approach in our official blog post: Why microSD backups should not be encrypted by default
5. Get Started!
That's it! Your BitBox02 is now set up and ready to use. You can start sending and receiving cryptocurrencies securely.
Important Security Reminders:
- Always download the BitBoxApp from the official
bitbox.swisswebsite. - Keep your device password confidential.
- Store your microSD card backup in a secure, private location, separate from your BitBox02. Consider making multiple backups if needed.
6. Video Tutorial
We’ve also created a video tutorial for additional clarification. Please note that some visual elements in the video may differ slightly from the current interface due to updates, but the overall process and steps remain the same.